Tuesday, November 20, 2018

$2/lbs Brisket and Time Management

So two weeks ago I saw Kroger was having brisket on sale for $1.99/lbs. Finally!  My time has come to smoke a brisket.

I picked up two packer cuts. Both were a bit larger than I wanted (15 & 16 lbs, and I wanted more in the 12 lbs range) but these were the smallest they had. I think that's why it was on sale to deplete their inventory. But hey, I was happy.

Time Management


So, my younger son works now and he's been the one egging me on to do brisket on the smoker.  Since my availability to use the smoker is on the weekends, and he (more or less) works on the weekend, coordinating this so it's ready for a family meal before he rushes off to work can sometimes be a chore. When he told me he had to work at 6pm on Saturday I did some quick calculations and realized I would have to start about 2am.  Figured 12 hours on the smoker, 1 hour rest, time to eat, clean up and get ready.  Should work out.

But this also means I had a 'hard stop' for cooking at 2pm, regardless how ready it is.  More on that later.
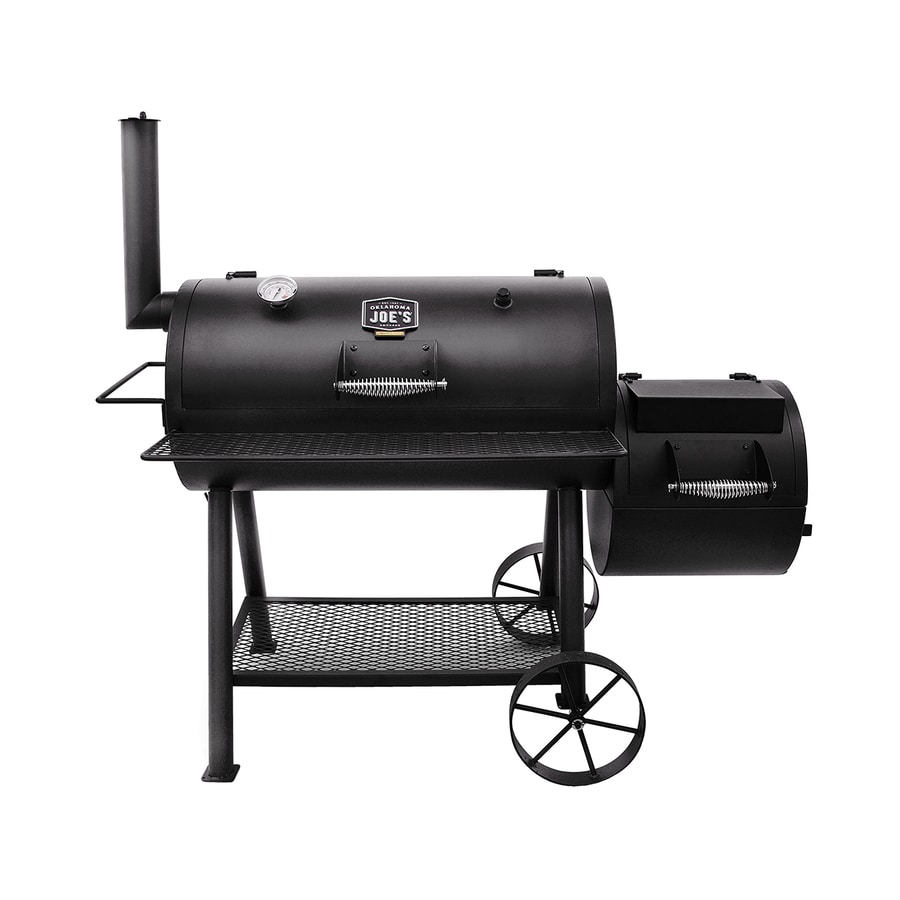
The Smoker


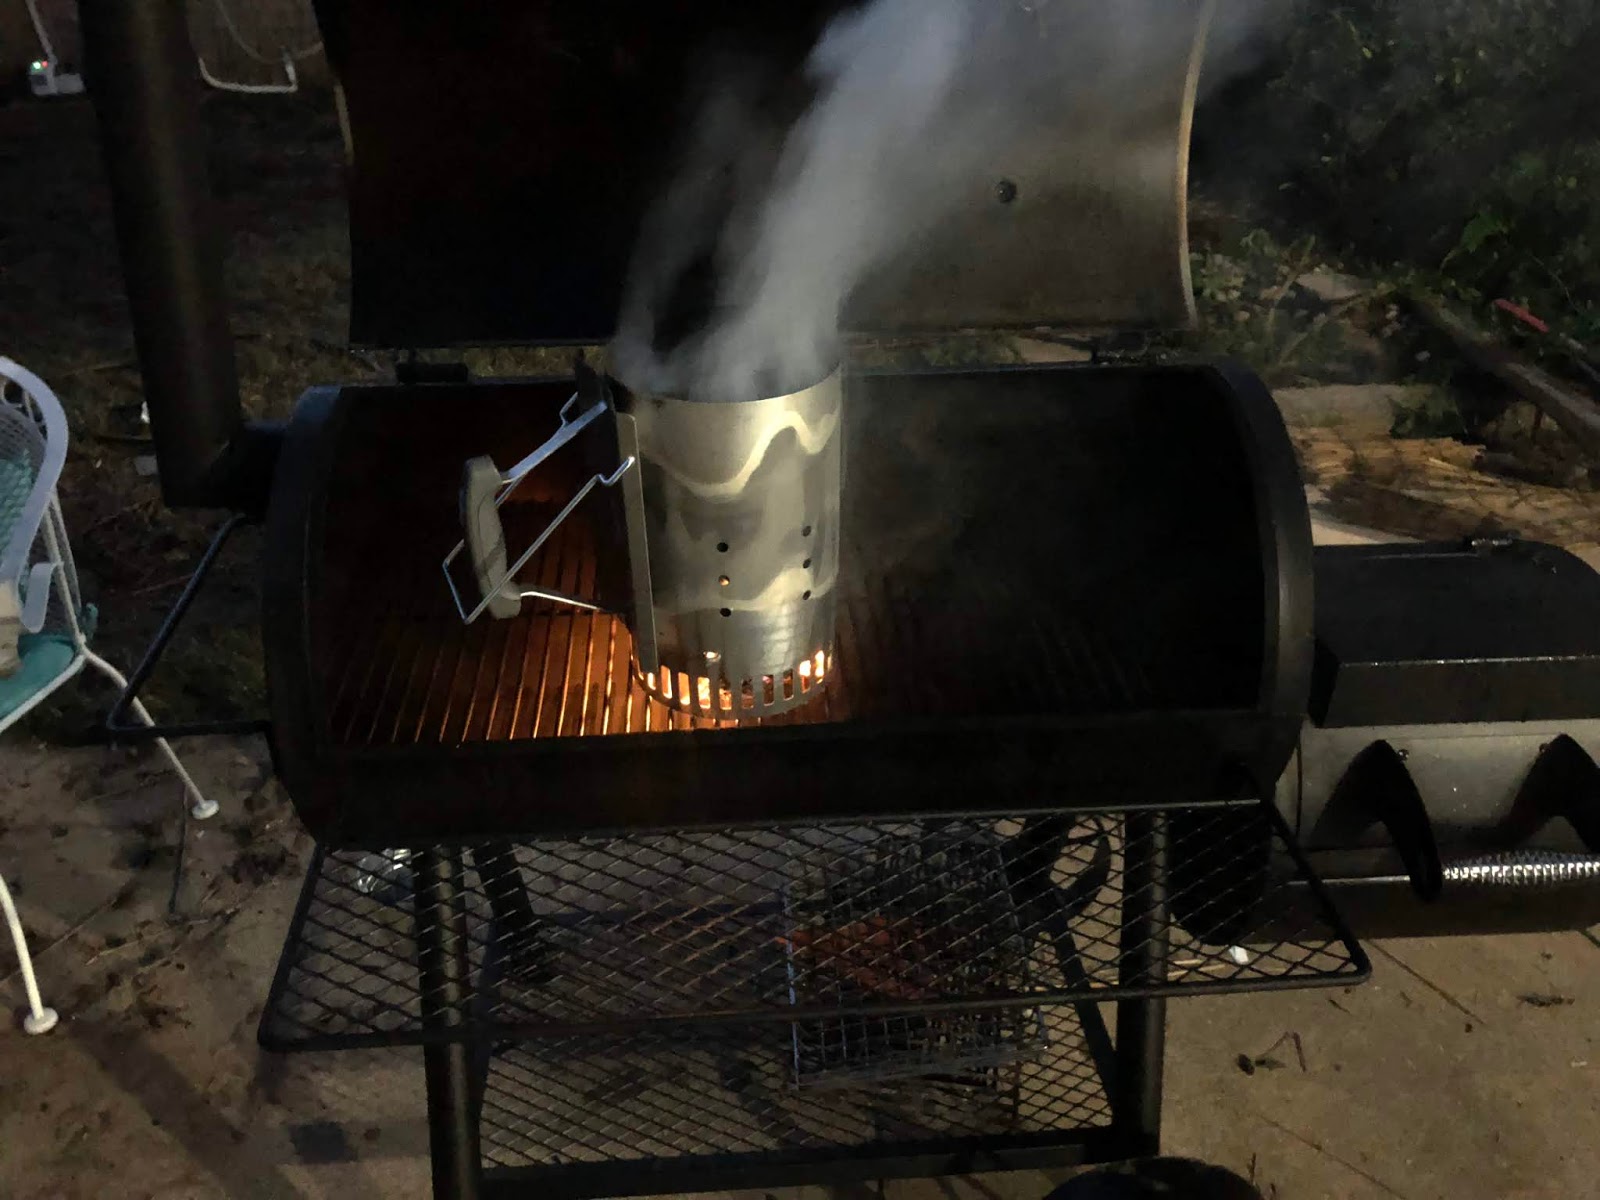
See? I remembered this time!
Before I go any further, if you read my last post you know of my struggle with keeping the fire going.

This round I remembered to add back the grate. Now oxygen can get underneath the fire and it won't smother like last time.

Also, it was cold Friday night when I was preparing everything.  Close to (but not quite) freezing overnight.  Since outside temperature can have an effect on the smoker as well, I decided to do two chimneys of charcoal, instead of just one to get a pretty goof fire going. Lots of heat. And get the main chamber up to temp a lot quicker.

So, after lighting the chimneys, it was time to trim and season the brisket.

The Meat


Trim away! Trim away! Trim away!
(Apologies to Enya fans)
I chose the smaller 15 lbs packer because with the larger one I'm going to split the flat from the point (flat is the leaner chunk of muscle and the point is the fattier chunk, sort of sitting on top of the flat, connected by a good amount of fat) and make pastrami with the flat and barbacoa with the point. But that's another blog post.

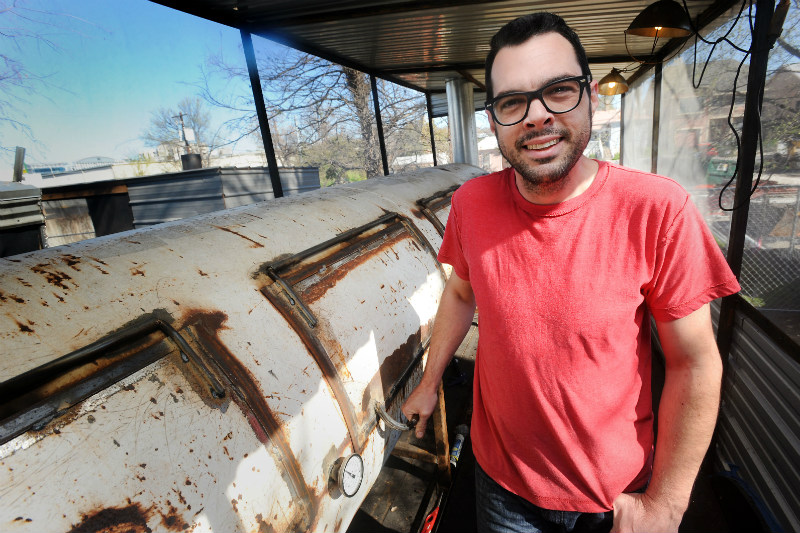
I trimmed as much as I dared.  Some areas are easy. Some parts of the fat was just unusually hard and you can tell it won't render when cooked, so those pieces to cut were easy. For everything else, my patronus, Aaron Franklin, says try to trim to about a 1/4" of fat. That should be enough to fully render during the cooking.

Ready for the Smoker!
For fun, I tried weighing how much fat was trimmed, just to see what the final result of a 15 lbs brisket.  So first, we started with a 15.75 lbs brisket.  The trim pieces came to about 1.6 lbs. So now we're at about 14.15 lbs of brisket. Not bad.

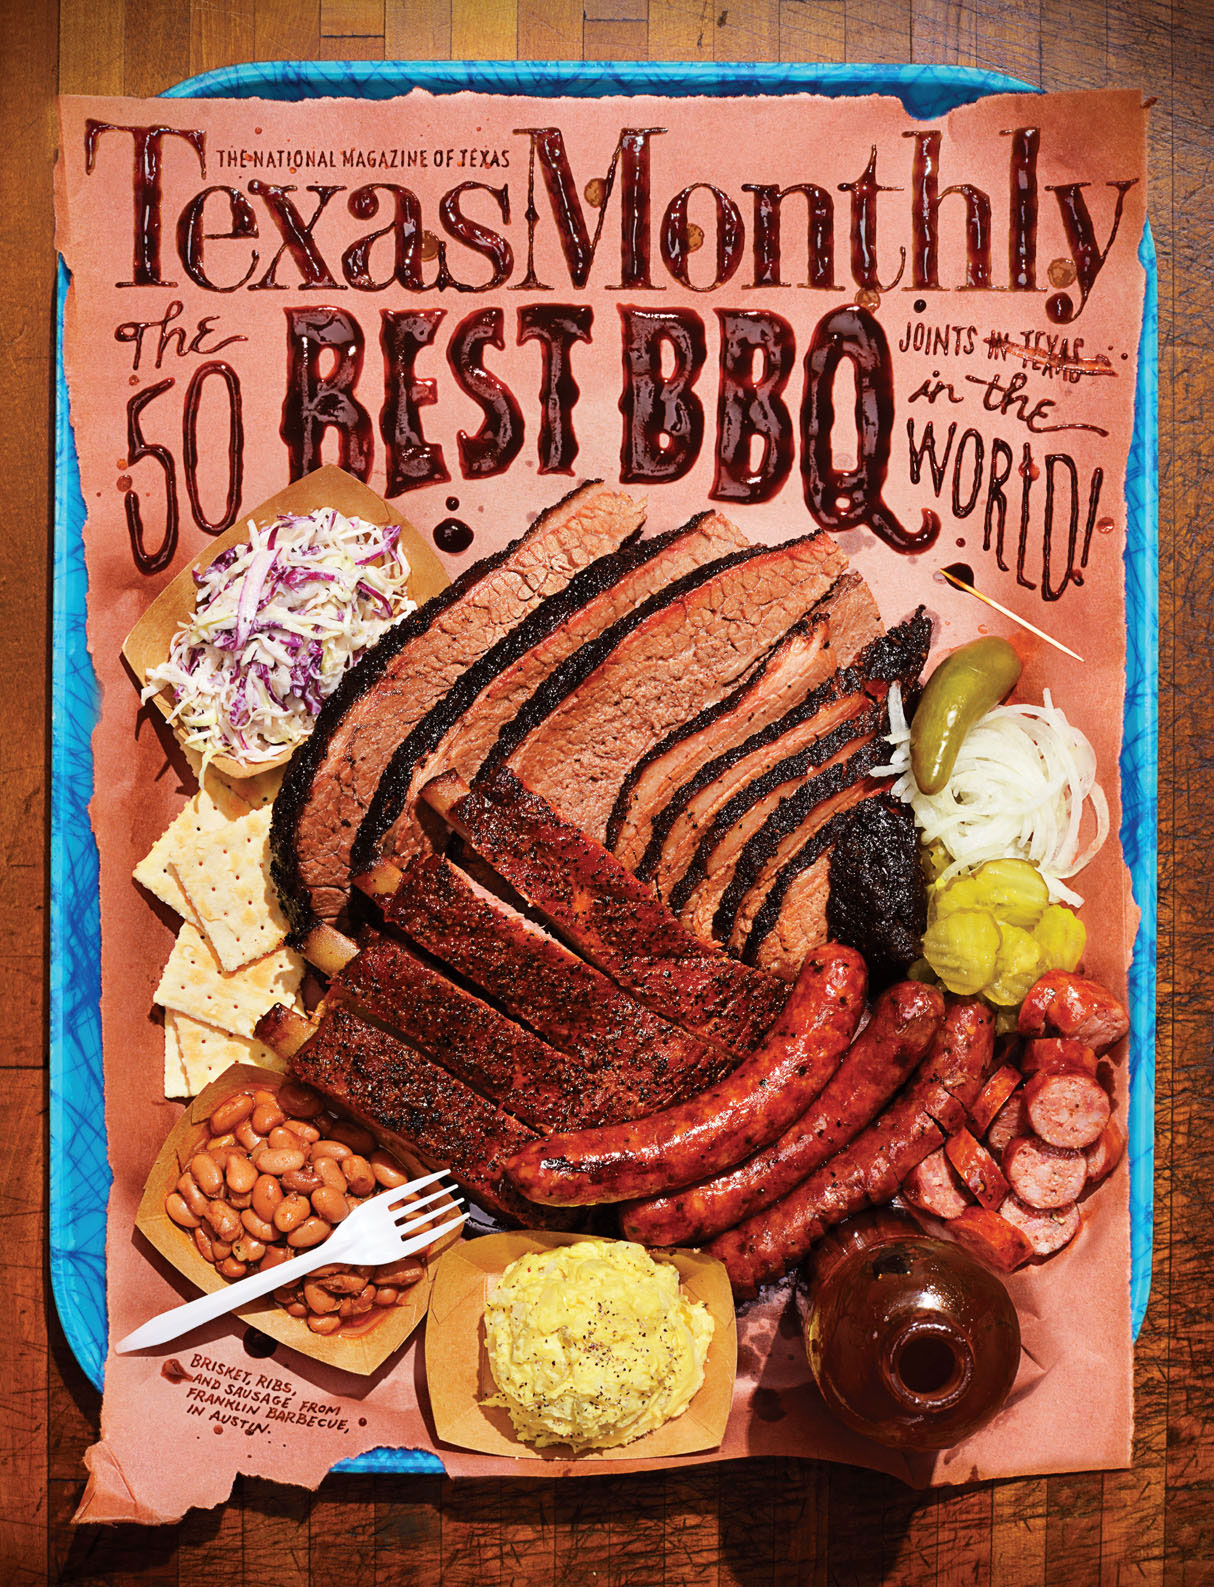
Now, to season it. Again, my patronus suggests a 50/50 blend of salt and cracked black pepper. In the past I've used store bought rubs and made my own adding garlic, onions, cumin and sugar. All are good, but I wanted to try Central Texas barbecue this round and see how it goes. So, loaded up the shaker and rubbed generously all over the meat.

The Cook


See you in about 4 hours.
Coals: in the firebox. Oak logs: igniting. Brisket: trimmed and rubbed. Smoker: nice 275 degrees. Time to get  the meat on the grill.

Set the meat, close the door aaaannnndddd....wait. (And drink beer - Shiner Blonde this round)

Don't worry. I only had two. It was already 2am when I started cooking.

Fire management was a LOT better this round. But that's not to say I still didn't encounter problems.

The wood I got was oak cut for firewood. The pieces were huge. Some pieces wouldn't even fit in the firebox. But even the ones that did, they were so large pieces it caused its own issues of smothering the fire, or when it finally catches it would get the temperature too hot, meaning cut the oxygen and choke the fire.

4 Hours cook time
I separate all the wood pieces from smallest (about 2-3" diameter) to largest, with the hopes when I get to the larger ones enough time will have passed I can break out the electric saw and cut these without it being too early for the neighbors.

My routine that night was pretty simple. Check temperature, add/stoke wood as necessary, set time for 30 minutes, power nap, repeat. After a few hours of this I was able to increase the time to 45 minutes, but wouldn't dare go longer than that.

Four hours in, curiosity got to me and I had to check (and take a picture). Looks good so far. Plus I had two smaller pieces in there I was using to make pinto beans to go with lunch today, so I retrieved those.

How Cold Was It?


Inner Space Cavers got nuttin' on me
So, to give you an idea how chilly it was overnight, my grease drippings I collected in a tin was cooling before collecting and I had a sort of beef tallow stalagmite.


8 House Later


8 hours later
Eight Hours passed and it was getting close to wrap for the final leg of the cook. I did a quick temperature check: the point was about 175 and the flat was about 160. I expected this difference since the heat direction hit the point side first (it has more fat so it can take the 'brunt' of the heat in the cook) but was a little concerned the flat was a bit low for me.  So I wrapped the meat and placed back in the smoker, this time flat side facing the firebox.

Another 4 hours and it should be ready...

...should be.


The Final Hour and Rest


So, eleven hours in and I started checking temperatures.  Point was at about 190 and the flat was hovering about 180.

So, real quick. Lots of people know that when cooking, say ground beef, you achieve an internal temperature of 165 and it's done. Not the case with brisket.  I don't know the magic that's involved, but basically the answer to this riddle is "If you overcook it, it gets tender" which goes against every cook's fundamentals regarding when a piece of meat is done.

And apparently, about 203 degrees is done.

As I mentioned above, I'm on a time limit. Son has to be at work by 6pm. It's 1pm. I've got another hour before pulling from the smoker, and there's another hour of rest and roughly 20-ish minutes to prep everything else for lunch. So, 3:30pm for dinner is the goal.

And right now it's underdone.

I won't bore you with the details, but basically the next hour was spend closely monitoring the temperature and by the time it was ready to pull, it was at about 195 for the point and 188 for the flat. It'll have to do.

I pull, bring into the kitchen and let it rest for an hour.

New Toy

Say 'Hello' to my little friend!

So, after it rested for an hour, it was still plenty warm to the touch.  In the meantime I finished the beans and cornbread and got everything ready, waiting for the brisket at the last minute.

Now it was time to unwrap and slice. I got me a new 12-in stainless carving knife specifically for slicing brisket.

And let me tell you, it cut through like buttuh! Nice smoke ring. Juicy. Smokey goodness,  And I really like the 50/50 salt/pepper blend. It really highlights the meat instead of masking it.

Now, those little 10-20 degree differences in the point and flat?  Flavor was there, but there was definitely some toughness still I could tell (You're your own worse critic as they say) but the family really enjoyed it.  And any barbecue you can still eat is always a success.

Takeaways


The end result!  Smoked carcass!
So, overall it was a success. There were some missteps along the way, but nothing detrimental. Just little tweaks needed here and there.

And that's the point of the blog.  To record my experience and learn from my mistakes and missteps along the way.

So, what did I learn?

  • Wood needs to be smaller pieces (no wider than 2.5" in diameter)
  • Try to use a smaller (12-ish lbs) brisket. 15 lbs was just too much.
  • Take into account longer cook periods. Especially if you're trying to have it ready by a specific time.  Easier to start earlier and be done and keep warm, than to have to pull before it's ready.

Thursday, November 8, 2018

Bad Blogger! Bad! Bad! Blogger!

I'm a tease!
So, I teased in Facebook, stating a new blog was in the works. Then I did the unthinkable: I forgot to get pictures of the actual barbecuing. Sorry.

I can blame it on the lack of sleep, too excited how it turned out, too much work with the fire and didn't have time, etc, etc. But in the end, I didn't take pictures. But I still think I can salvage a decent post about my smoker's maiden voyage:

So, Saturday, October 27 turned to be a fine day (early morning) to launch my smoker and indoctrinate it with its first meat: pork butt.

I know, I know - we're in Texas and we're 'The Beef People' but my choice was due to a few factors:

  • I make a mean White Chicken Chili (won best chili at work) and the family has been clamoring for me to make it again (October is Texas Chili Month after all) but my wife has developed an allergy to poultry over the past few years. Seemed unfair to make something she either can't eat, or will and get hives from it if she does eat it. So, since pork is 'the other white meat' I thought I'd try it.
  • Cheapest I could find brisket at the time was $2.69/lbs A bit expensive for me as I usually see it in sale closer to $1.99-2.25
  • I like pulled pork. So sue me. Probably due to my heritage of my dad and grandparents growing up in North Carolina (I even like livermush)
So pork it is! Nice 8 lbs pork butt ready for the smoker.

The Prep


Charcoal all fired up
I start my smoker to get it warmed up for the long smoke. I fill my chimney starter with lump charcoal and light 'er up and wait.

Now, part of the reason for this blog is for something for me to do, but also hoping others might pick up a tip here and there based on my successes and mistakes. This was one of those mistakes I hope you get a tip from:

After cleaning my smoker from my seasoning fire, I forgot to add back the firebox grate for the charcoal to rest on so oxygen can get underneath the fire. Yea, dumb, rookie mistake. But more on the consequences from that later.

I dumped the red-hot charcoal in the firebox (sans fire grate) when I realized my mistake. Too hot to do anything now, so I just went with it and place a post oak log on it to catch. A few minutes later, I was in business and closed the lid to get it going.

Next, I pulled out the pork and applied a rub. I'm not one to hide recipes. If others did that as well, I'd never understand how to cook or smoke. It's a simple rub of:
  • 1/3 part salt
  • 1/3 part cracked pepper
  • 1/3 part of combined (equal parts):
    • Garlic powder
    • Onion powder
    • Hungarian paprika
Mix well and put in shaker.

In the past when I've done pulled pork, I add brown sugar to give a little sweetness. But I've learned that sugar burns, especially when on a smoker for 12 hours, so I left it out this time.

So, I've rubbed my butt (snicker) and my smoker is slowly warming up to 275 degrees to put it on.

The Smoker


Last post, I discussed making modifications to my smoker. Now I get to put it to the test.

No leaks here
First, the sealants. After sealing the seams & lining the lids with a high temperature gasket, with the smoker going, nary a leak detected.

Less leaked smoke means less leaked heat and better control over the cooking temperature.  Success!

Next is the new thermometer. I kept the old one and have it in place where the pre-drilled hole is in the top-left of the main door for now, just to see how much of a temperature difference there is between it and the new thermometer and its location.

290 degrees - a bit hot
First, I like how the new gauge is easier to read. Blue means a cold smoke (100-225 degree range), red means hot smoke (225-350 range) and white is just too hot, requiring immediate attention before the meat becomes a briquette itself.

So after adding a water pan in the smoker (to add moisture to the air and prevent drying of the meat), the pork butt, closing the lid and getting back up to a temperature of 275, I compared the two gauges.

Gauge one, the new one I installed, is set about meat level (about an inch above where the grate is) and at a point where I would have the tip of the meat reach so I know what the temperature would be once it hits said meat. 275. The temperature I want it.

260 - that's a huge difference
(and the last of the pictures taken - sorry)
Next gauge is the one that came with the smoker. It's high and near the back where the meat would be so I know it isn't as accurate as I want it to be, but for fun right now I have it installed just to see.

260 degrees! This was taken at the same time I took the above picture, so that's about a 30 degree difference. Granted, it's not 100% accurate - as mentioned, it's too high and not a great thermometer I'm told, but still I think it gives an idea how the temperature changes as it moves through the smoker.

So, smoker is smoking, meat is on, water pan filled, check the temperature, all good.  It's about 5:30am, so in about 13 hours, we'll have pulled pork for dinner.

Blue Smoke


Blue smoke is a new concept for me, I only heard about maybe a month ago when I was considering getting my new smoker. For those that don't know, apparently thick, billowy, white or gray smoke coming from your smoker is actually a bad thing. I say 'apparently' because with my Bradley electric smoker, that's all it produced and I assumed visible smoke = good.

Apparently that's not the case. Visible smoke means the fuel isn't burning cleanly. Not enough oxygen getting to it and therefore smolders the wood. That whiteness you see in smoke is creosote. Creosote makes your foods bitter to the taste, which, I just assumed meant good barbecue. Silly me.

The actual best thing you want for your smoker, is practically no smoke as all (how's that for irony) and you want your fuel to burn cleanly (no smoldering) and the smoke chimney should emit almost no smoke with an almost blue tint or haze to it. That's your goal. That's what gives your meats that 'smoke' flavor without the bitterness.

Now, remember above when I said I forgot to put back the firebox grate? Yea, welcome to Creosote-city, population me and my butt.

Without the grate, no oxygen was getting underneath the fire. And the ashes it's producing is smothering the heat and flames below it causing it to smolder and, you guessed it, thick, billowy, white smoke. I mean, THICK!

Plus my temperature control for the smoker was really difficult to keep a consistent temp. I was back to using a fan to blow on the coals to get the temperature up and stop smoldering. It was pissing me off. It wasn't nearly as hard keeping this temperature when I seasoned it. I felt like I was back to my bullet smoker. Now I understand why I had to work so much with it.

There were a few moments I had the right temperature and clean burn, but not many. I would say maybe 20% of the time (2+ hours not in a row) I was okay, but the other 80% (8-ish hours) it was me vs fire.

Lesson learned: Make sure I have the firebox grill installed. If not, just move the coals somewhere to add it and add back the coals. It was NOT worth it how much energy I had to put into this.

The Wrap


So, after about 10 hours of almost constant fighting, I threw in the towel (so to say): I cheated. I preheated my oven to 275, grabbed some aluminum foil, sprayed down the butt with apple cider vinegar, wrapped it and finished the cook in the oven.

I know it's cheating, but it's absorbed plenty of smoke flavor (and creosote) during that time, and now I just needed to get that sucker cooked.

A few hours later and it finally reached 165 internal temperature.  I pulled it our of the oven and let it rest another 90 minutes (still wrapped) before pulling.

The Results


So, pork is pulled. I'm exhausted & frustrated. But I got to say, even with all these setbacks, it actually turned out pretty good. Definitely a heavy smoke flavor (which I like) with some bitterness (now that I've become aware of this it's now more noticeable when I can taste it) but really, it wasn't bad.

As for the White Chicken Chili I mentioned above?  Took about 3 lbs of the smoked pork and substituted it for the chicken. I think between the smokey flavor and the pulled pork texture instead of ground/cubed chicken it's actually a bit better now. But White Pork Chili doesn't have the same ring to it as White Chicken, so I'll need to work on a new title for it. Maybe 'Honky Butt Chili' or something equally ridiculous.

Conclusion and Lessons (Hopefully) Learned


So in the end I'm marking this a success because all the pork was consumed over time. But there were some take-aways from this and hope to improve on:

  1. Take pictures (Sorry about that)
  2. Make sure the fire grate is in place, and if not when you dump the coals, move the coals out to some fire-retardant receptacle and add it!
  3. Hopefully with #2 in place, I won't need to fight the fire so much and can keep a steady temperature more consistently, and achieve that elusive blue smoke.
  4. I think I'm getting another temperature gauge and install it grate-level near the back so I can get a more accurate temperature.
So, all things considered, an exhausting but tasty maiden voyage for my smoker, and any time you can eat what you cooked, regardless of how much effort went into it, is a success.

Next post: Kroger has brisket for $1.99/lbs! Guess what's smoking this weekend!

Wednesday, October 17, 2018

Where I Was, Where I Am and Where I'll Be - Part 4

Where Am I Going?

So, where am I going from here? I have some experience. I've used some equipment. I've gathered some knowledge. And most importantly, I got a new smoker.

So, I seem to have been doing a lot of talking and haven't actually done anything with this new smoker. What gives?

Rain, Rain, Go Away.  Seriously. Just Go!
A few things. First, the weather. It's been raining here. More importantly, it's been raining at the wrong times (there's been nice and sunny moment over the weekend)

Friday night was fine for curing the smoker.  It was a short span of time and got done about 1am with that (I started late) Saturday was a bust. Rained all day and didn't let up.

Saturday night to Sunday morning would've been perfect! Except I had church in the morning and would be away for about 3 1/2 hours around the time to pull the meat. Plus my daughter heads back to church about 2pm for band practice, so there's a real small window of opportunity to actually sit together as a family to eat.

Sunday, for almost all day, was perfect weather. No rain. But even if I started when I got back from church, it wouldn't be ready until after midnight tonight.

And Sunday night the rain is supposed to start up again as well, and of course there's the whole gotta-go-to-work thing, Monday. (Overrated, in my opinion)

So yea, last weekend was a bust.

Sealing the Gap...
So I mentioned a few things, weather being one of them. The other is needing to tinker with the smoker some. Okay, okay, I *want* to tinker with it...

When I cured it Friday, I saw smoke escape along the seams where the unit's parts connect as well as along the door seam.

Escaping smoke means escaping flavor. Escaping smoke also means escaping heat, which means harder temperature regulating and possibly longer smoke times. If I'm going to be serious about this, I need to be serious about this. So off to Amazon for a few purchases. A few days later and voila! Mail call on Monday with my goodies!

...and the Chimney
First, the escaping smoke. I attacked this two-fold. One area escaping is where the firebox and main chamber connect with bolts only. I sealed where it connects with a high-temperature, food grade silicone. I also sealed where the chimney stack attaches

Next, I used a high temp smoke gasket for the door. This will also help keep smoke and heat from bleeding out.

Quick note about the gasket. I thought it was a rubber gasket when I ordered it. When I got it, it had a felt quality to it. But, after holding a piece to a lighter for about a minute, it never caught fire (or melted or anything) so I was satisfied it wouldn't cause problems with the heat from the smoker.

Getting Ready to Drill
Another tip I learned is the temperature gauge that comes with smokers are usually cheap, AND in the wrong place to accurately monitor your temperature. The thermometer should be close to the level your meat goes. High up top on the lid can have a real difference, and you want to be as accurate as possible with it.

So, I ordered a new temperature gauge and drilled a hole, closer to grill/meat level and attached.  Plus the color coding on the dial makes it infinitely easier to make a quick glance and see where you're at.

In addition to these purchases, I also got some butcher paper to wrap the meats in, and a grate lifting tool if I need to move them around or access underneath them while cooking.

All said, I believe my smoker is ready for its maiden voyage. Texas weather has been real funky lately with tons of rain. Right now it looks like Friday night might be the time to try my first smoke, but its still a few days away and anything can happen in Texas.

As they say, if you don't like Texas weather, wait 5 minutes.

So now you know my past, present and hints of my future.

My blog posts will probably start being less frequent as it would just chronicle each smoke I try, and as much as I'd love to, I won't be able to smoke every weekend.

Sunday, October 14, 2018

Where I Was, Where I Am and Where I'll Be - Part 3

Where Am I?

Five years. Five great years with my Bradley Smoker, but after my last fiasco I had an epiphany: electricity and technology can fail when you least expect it.  Fire, can't. (Well, it can, but you know what I mean)

So, after five wonderful, smokey goodness years with my Bradley Smoker (and I can't figure the life out of me me how to fix it) I'm going old school.

Aaron Franklin is My Patronus
Now, as mentioned in my previous post, over those five years I've gained a bit of experience and knowledge with smoking meats. I've grasped a better understanding of what chemical changes the product goes through when smoking. And just recently (past 6 months or so) I discovered Aaron Franklin.

I've heard of him before, but never really paid much attention. To me, he was this hipster guy who bought his old boss' custom smoker when his boss was bankrupt and selling his equipment, and Aaron got it and opened a new BBQ place in Austin. It almost seemed like an underhanded move, the way it was portrayed. Plus, he looked NOTHING like a BBQ Pitmaster. He was young, horned-rimmed glasses, thin (never trust a skinny cook and all that) and just looked more of a Starbucks barista, then someone who knows BBQ. Boy was I wrong!

I discovered his single season of BBQ with Franklin on PBS, I started to take notice.

BTW, PBS? I need a Season 2.

Like Alton Brown's Good Eats, he likes to break down and explain the science of smoking meats. He likes going old school: no charcoal (maybe to start a fire) fire and smoke with wood only. Keeps everything simple. His rubs are primarily salt and pepper only (some variants with poultry and pork but still primarily salt & pepper) And let's face it, the man sells out every day within 3-4 hours of opening. With lines starting as early as 6am as if he's premiering the new Star Wars movie.

So, he must know something.

Texas Monthly - Highly Recommend Subscribing
So after consuming blogs, Texas Monthly articles (which I have a subscription) YouTube videos, and recently ravaged through Season 1 of BBQ with Franklin, I was inspired, and ready, to make the plunge.

I was planning to get a wood smoker. No electronics. No wood pucks or pellets that auto-advance. No tech (Well, except a thermometer(s) ) But what do I get?

I'm not getting another bullet. Or even a higher grade bullet. That left a bad taste in my mouth (no pun intended) I know whatever I get, I'll still have to monitor for fire & temperature control, but wanted something a little more conventional. Plus with the fire at the bottom and rising, I wanted something else.

I started looking seriously at The Big Green Egg/Kamado style, but it's primarily a grill. And while I watched a few videos how people smoked a brisket, there wasn't a lot of room to add something else if you wanted to add a 2nd brisket or other meat. So that was out.

So, I (re)turned to my patronus, Aaron and thought "WWAFBBQ?" and decided whatever I get, it would be an offset smoker. A vessel dedicated to only smoking.  I have a grill, so I'm covered there. And my Bradley (May she rest in peace) was a dedicated smoker as well, why not just continue with the tradition.

So, next question is what to get. Looking online, all offset smokers were pretty much the same.  Firebox to the side, and a horizontal barrel attached for the heat and smoke to move through, and escape through a chimney on the far side.

So, I went to my local Lowes to see what was offered. They had two types of offset smokers. Both from a company named Oklahoma Joe's.

Oklahome Joe's Longhorn Combo
One smoker was a combo propane grill and smoker. It was tempting to get it out of convenience. I had one vessel to do both and take up less space in the backyard.  But the smoker chamber was small. Room for only one brisket, so that was quickly dismissed.

So, that left me with the other: Oklahoma Joe's Highland. It was simple. Heavy gauge steel. Large cavity where I could hold easily two briskets or any combination of meats and have plenty of space. The only thing I didn't care for was the name (I AM from Texas, after all) but for the price, I can't beat it. So, Texas ego aside, I grabbed one and headed home to assemble and get it ready.

Oklahoma Joe's Highland
Assembly was a snap. Got it fully put together in about an hour. Then seasoned it. Using vegetable oil and a rag, I wiped everything inside the smoker with it, and parts I couldn't get to, I used vegetable spray, to make sure I got all the corners and crevasses.

Since this cook was just for seasoning, I wasn't worried about using wood right now and just used lump charcoal. Got the fire started, dumped the coals into the firebox and waited.

This was also a great time to work on temperature control. Being this was a challenge for me in the past, and no meats were harmed in the seasoning of this smoker, I can play around and see what changes affected what temperatures.
Seasoning the Smoker
So, temperature control is definitely an art of its own. I know the basics. Add oxygen and the fire burns hotter, choke off the oxygen and it burns cooler. But it's interesting to see how little changes can have dramatic affects on your temperature.

The fire got up to about 300 degrees. To season it well, you need to get it about 250 for a few hours. So I tried to see if I can keep the temperature the entire time at 275. That's a good number a lot of pitmasters cook at. So it seemed like a fine goal.

One other rule I promised myself with this smoker - I won't fiddle with it constantly. If it gets to 280 or lowers to 265, I won't panic and go crazy adding fuel, opening/closing dampers, etc.

And for the most part, I was pretty consistent. I think one thing I did wrong was the fire was too small. I had everything opened to get as much oxygen to the fire to keep up the heat. So a bigger fire next time and it should be fine.

But for the next 4 hours, sitting outside, drinking some beers (Shiner Bock this round) and just listening to the night (and my dogs playing outside) it was really nice.  I think one difference between now and when I was using the bullet was back then, I had a panic. I wanted to do other things while this was 'working' on the meats. Errands to run. Watch the Longhorns play inside. That sort of thing.

Now, I've realized that this is part of the entire experience. Just sitting outside and enjoying. Slow down. Of course, now with technology, I have my iPad to watch TV or read while out here. So that helps. And as experience comes with each smoke, I'll be able to walk away from the smoker every 30-45 minutes and get other things going. It's not going to ruin that smoke if the temperature gets down to 270, or rises to 280 or whatever. That's short term that can easily be corrected. When smoking something for 8-12 hours (I'll let you know how my first real smoke goes) those changes shouldn't have that large of an impact.

So, now that I've seasoned my smoker. It's time to do my first smoke, right?

But first, I need to modify my smoker some.

To be concluded.

Saturday, October 13, 2018

Where I Was, Where I Am and Where I'll Be - Part 2

Where was I? (Continued)

So, my first smoker was a moderate success. But the effort was too much.  Wasting a whole day just wasn't worth it when I can get ready-made bbq on a whim.

Then, I saw this...

Bradley Digital 4 Rack Smoker

It was everything I wanted and needed! Refrigerator-type seal for cooking area. Digital temperature control and timer. Wood pucks that only smolder to produce the smoke. Basically, your fire & forget smoker and I wanted it!

I poured over its description. Went to the Bradley Smoker website. Watched YouTube videos reviewing it. I wanted it. I needed it.

So, I had a weak moment (I'm famous for these, btw - just ask my wife) and bought it when we really didn't have the money.

But I got it. And 4-5 shipping days later, it came!
I was so excited as I assembled it and getting it ready.

My Second Smoker
Now, I just needed to test it out. Too long for brisket. I wanted something now! And more importantly, I needed something I already had on-hand in the fridge. Fish!  People smoke fish.  Yea, I'll try that. 

So, I pulled out some frozen tilapia fillets, did a quick brine and smoked it for a few hours.
Smoked Tilapia Fillets
So I loaded the racks with fish. Added the wood pucks. Set the temp and timer and START.

A few hours later, they were ready! And they. Were. Perfect! Tender. Really flavorful. And most importantly, I didn't have to monitor it every 5 minutes like my old bullet smoker! It was definitely fire & forget. THIS was the way to smoke. I was a happy camper.

Whole Chickens
Of course, after successful pilot smoke, it was time to open the throttle full and go to town. Whole chicken and pork butt were my next smokes over the next month.

Pork Butt
Again, prep. Load wood pucks. Program timer and temp. Hit start. Walk away.

(To be fair, you have to empty the water bowl that catches the spend wood pucks every three hours, but this was a far cry from sitting next to my bullet the entire time. I could go do errands. Take a nap. Watch TV. My Saturdays were mine again!)

Then I got ambitious. I have 4 racks to place meat. So...fill 'er up! Chicken, pork, brisket, ribs. Do it all! Again, fire & forget.
Now, with this much volume, and me thinking I'm such a BBQ badass and all, it never occurred to me this much meat would dramatically increase the overall cooking time for everything. So much more time, in fact, I ran out of wood pucks to cook everything. But that's okay, the wood pucks were for the smoke only. There's a heating element also in the smoker that's actually the cooker. So even if I ran out, I had heat to finish it.

I don't remember the overall time for everything to be finished, but it had to be 12+ hours before I pulled the last piece of meat from it.
Go Big or Go Home

But still, it was all good. And we got to be carnivores for the rest of the week, devouring its smokey goodness.

Yup. This was the future of smoking, and I was pleased as punch I was pioneering it.

Then my first real setback.

I was getting something ready to smoke (probably brisket) when I turned on my Bradley Smoker and heard a "pop!" and no heat. The heating element burned out. 

This was really depressing as I had something to cook and no way to do so.  So, as a result, I had to resort to cooking it in the over that day.  I was majorly depressed about it.

Ordered a replacement part. Got it in the mail. Changed it our. (And let me tell you, with about a year of build-up of smoke in the chamber, that was a messy fix) but I got her back up and running and continued with my next (and many) smokes for the next 4 or so years.

Chicken Poppers - My Absolute Favorite Thing to Smoke
Then, about a month ago, I decided to be ambitious again.

This time, I tried to make barbacoa (Mexican style brisket, essentially) pork butt, whole chicken and chicken poppers.

Everything bought. Everything prepped. Wood pucks purchased. 12-pack of beer cooling. Yup, this is going to be a great weekend!

6am rolled around and I got up. Pulled the meats to get to room temperature. Went outside to "fire up" (turn on) the smoker when this time I got another "pop" along with a bright flash from the back.

Not. Good.

Nothing came up. No heat. No digital display. Nothing. This is bad.

So, with it being about 6:30am, and everything closed to try to fix it.  I resorted to using my grill for indirect cooking. Again, wasn't bad. But I was beside myself I was so upset (again)

Now, these past 5 years with the Bradley (minus the two times it blew up) have been wonderful. I would still recommend this product for anyone wanting a semi-hassle-free smoker. The past five years, in addition to the above, I also smoked corn on the cob, chipotles, a whole turkey, scotch eggs, and a few other things I'm sure I've forgotten. I Have definitely gotten my return-on-investment on this.

But also, these past five years, I've gotten a bit more experience with smoking.  Not just the fire & forget, but actually starting to learn about the art of smoking. I've been watching videos and reading blogs behind the science of smoking and starting to grasp a deeper understanding of what happens when you smoke meat.

But with this latest disaster with the Bradley and waste (not really 'waste, as it was all still consumed eagerly) of meats to go into that smoker, and most importantly, I can't figure out what blew up to repair it (It's currently disassembled on a patio table) I've decided maybe it's time to upgrade to something new.

Or probably more accurately, downgrade to something old...

To be continued...

Friday, October 12, 2018

Where I Was, Where I Am and Where I'll Be - Part 1

Continuing the journey of fire, smoke, and beer

Where was I?

Eight years ago, I got an itch to expand my cooking skills. I live in Texas. I'm a Texan. I love barbecue. So, I figured it was time to try smoking out.

My First Smoker
I didn't want to spend a ton of money only to find I sucked at it or it was too much hassle, so I headed over to Home Depot and got myself a cheap-o $70 bullet smoker.
As with any true test, you always try your skill with brisket (At least in Texas). So, a brisket was my first smoke.  

Now, just so you know, I watched a TON of Alton Brown's Good Eats, so science was on my brain, and not necessarily cooking.  It's worked out for me so far, but with smoking, while still important, there are some things I just need to learn from experience. But going in, everything was a system:

Start fire. Wait for coals/smoke. Place meat. Wait pre-determined amount of time on smoker. Pull meat. Rest. Slice. I'm a master.

With that logic, I can do anything on the smoker. It's your basic cooking algebra where X is the meat, Y is temperature and Z is time. Interchangeable. Perfect! No touchy-feely 'every cook is different' philosophy. I have science on my side! And for a bit, I was right on the money (read: Lucked out)

First was smoke and temperature control. With these style smokers, the fire is at the bottom and rises, along with the smoke. I was EXTREMELY worried this might turn into a grill, so I tried all my might to not have any flames in my 'fire'. Of course, no fire means lower temperature. Lower temperature means longer or non-existent cook times.

One way to stifle the fire was using soaked wood. It seemed everyone did this so you get a smolder and not a fire, so I did that. I added soaked wood chunks on the coals (just like 'that guy' on TV) and watched the temperature drop dramatically.

So, I paniced. I started blowing on the embers. Nothing. I considered adding lighter fluid (And I think I did once or twice) but the wet wood never caught and the fluid burned up so quickly without time to soak into anything to catch. So out of desperation, I grabbed a small fan and blew on the coals to get oxygen in there and raise the temperature.

Once the water from the soaked wood evaporated, the wood caught fire (whodathunk?) And we were back to the whole fire is bad, stifle fire, temperature drops, blow on coals, temperature rises fire starts, repeat.

My First Brisket
And this is what I did for a good 8+ hours. It was an exhausting fight, and the bullet almost won. BUT, when I finally got the brisket at the correct internal temperature of 165 degrees (We'll talk about that in another post - I just lucked out on this one) I pulled it, let it rest and sliced.
Knowing what I know now, I was SO lucky this turned out well.  Great flavor. Great smoke. Tender. Absolutely delicious.

I'm a pit master! (I thought) and could do no wrong! (More on that, also later)

Extremely pleased, and apparently forgetting how much of a struggle temperature control on that thing was for me, I've concluded smoking is a good fit for me.

Next smoke was pork ribs. Started the fire. Got the rack of ribs on. And proceeded for the next 4-ish hours fighting with the bullet and its temperature.

This round wasn't as great. Ribs were a bit dry, but tasted good enough, so it was still a win in my book.

He's got legs, and doesn't know how to use them
So, what's next? I was craving Texas State Fair style smoked turkey legs! So, gathered a few pounds of legs at the grocer, brined them (love, love, LOVE brining pork and poultry) and set on the smoker.

Again. Fought with the bullet the whole time. As if I'm not learning from my mistakes. (Admittedly, I blamed the bullet itself, thinking with this cheap device, and that's just how it is)
Legs were done. Looked good. Smelled good. But wasn't. No seasoning on the outside skin. I figured the smoke was seasoning enough. That's all I tasted when I had one of these at the State Fair or other food vendor place that sells these. What gives?

So, for those keeping score at home I went from great, to okay but passable, to fail. Isn't it supposed to go the opposite direction with each successive cook?

Over the year of having this I did maybe 1 or 2 more smokes, but determined because of the effort. And how time consuming it is because I had to be right next to it and not do anything else for the next X hours, maybe this just wasn't for me.

Then, the Internet bestowed upon me something marvelous...

To be continued